
Registration Forms
Open in NocthinkModule: Meetings & Events · URL: /events/registration-form · Responsible role: Event Officer · Also used by: Owner/Director (full); no other role in the matrix
Screenshot: Brian Sanders (Deputy Director), Nocthink Demo Institute demo data.
Why I use this page
When an event opens for sign-ups, I build its public registration form here, publish it and share the link in the invitation email and on social media. Over the following weeks I come back to review responses, approve guests and export the list for the venue. The same builder works for project sign-up forms (e.g. survey enumerator recruitment).
What's on the screen
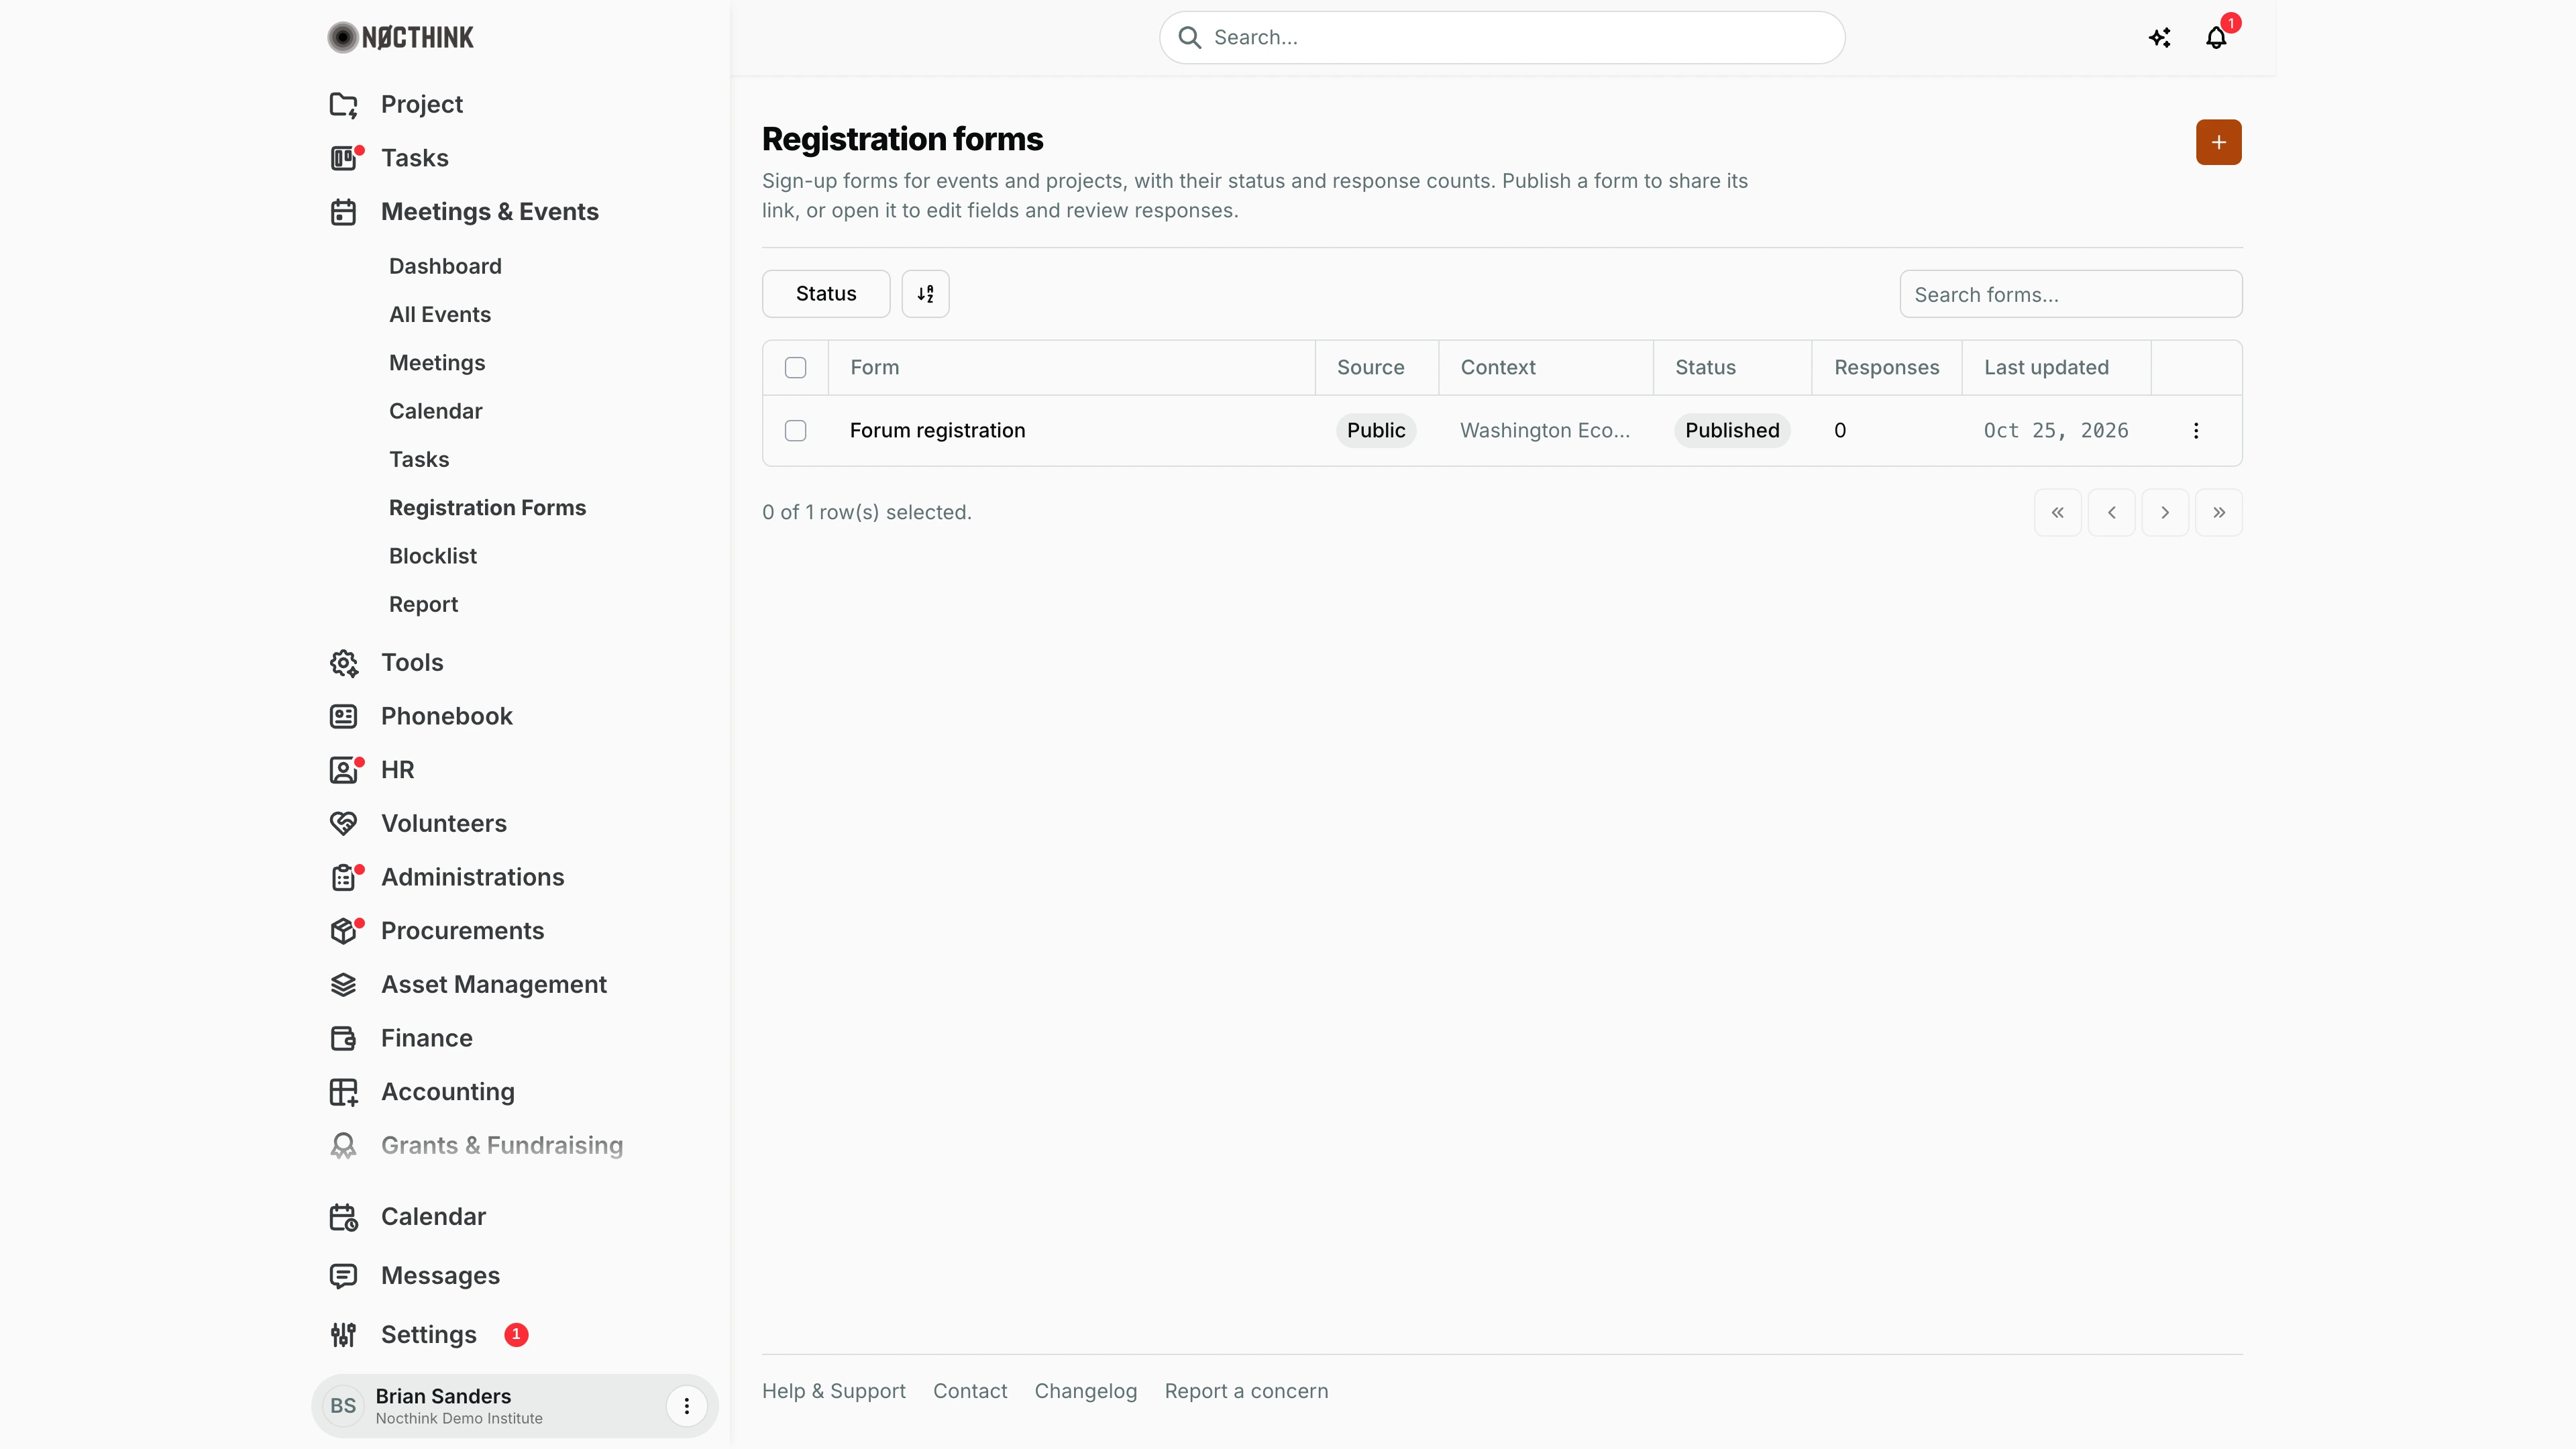
- Header — title Registration forms, description and the orange + (New registration form) button.
- Toolbar — Status filter (Draft, Published, Closed), a column/sort control and Search forms....
- Table columns — select checkbox, Form name, Source (Public or Project), Context (the linked event or project), Status pill, Responses (number of submissions), Last updated, and a ⋮ menu with View details, Edit form, Open public link (published forms only) and Delete.
How I …
How I create a form for an event
- Click the orange +. The Create registration form dialog opens (see Create registration form below).
- Enter Form name, e.g. "Forum registration".
- Under Source, choose Public (Event) and pick the Event (optional); or choose Project and pick the Project (optional).
- Click Create form. I land straight in the Form studio for the new form.
How I build the fields
- In Form studio (see Form studio below), add elements from the palette: layout (Section, Divider, Header, Paragraph), inputs (Short text, Number, Email, Phone, Yes/No, Checkbox, Checklist, Dropdown, Radio) and Table.
- Click an element to edit it in the properties panel: Label, Placeholder, Required field, Options (for choice fields) or Columns (for tables). Drag elements to reorder.
- Rename the form in Form name at the top if needed.
- Click Preview to see the public page in a new tab.
- Click Save changes. The header shows "Unsaved changes" until I save, then "Saved <time>". Nothing is saved automatically here.
How I publish and share
- Open the form (⋮ → View details).
- Click Publish. The status becomes published and the form starts accepting submissions.
- Click Share to copy the public link (
/forms/<id>) to the clipboard, or use ⋮ → Open public link from the list. - To stop sign-ups, open … → Close to responses (status Closed; responses stay, the public link stops accepting submissions), or click Unpublish (back to draft). Publish reopens a closed form.
How I review responses
- Open the form (see Registration form detail below). The left rail shows Form details, Submissions (Pending / Reviewed / Approved counts) and Form fields.
- Filter the response list with All statuses, Pending, Reviewed, Approved or Rejected.
- Click View on a response to see every answer, then Mark as Reviewed or Approve. My name and the time are stamped on the review.
- Click Export to download all responses as CSV (Submitted, Name, Email, Status, then one column per input field).
Detail page, forms & dialogs
Create registration form
Screenshot: Brian Sanders (Deputy Director), Nocthink Demo Institute demo data.
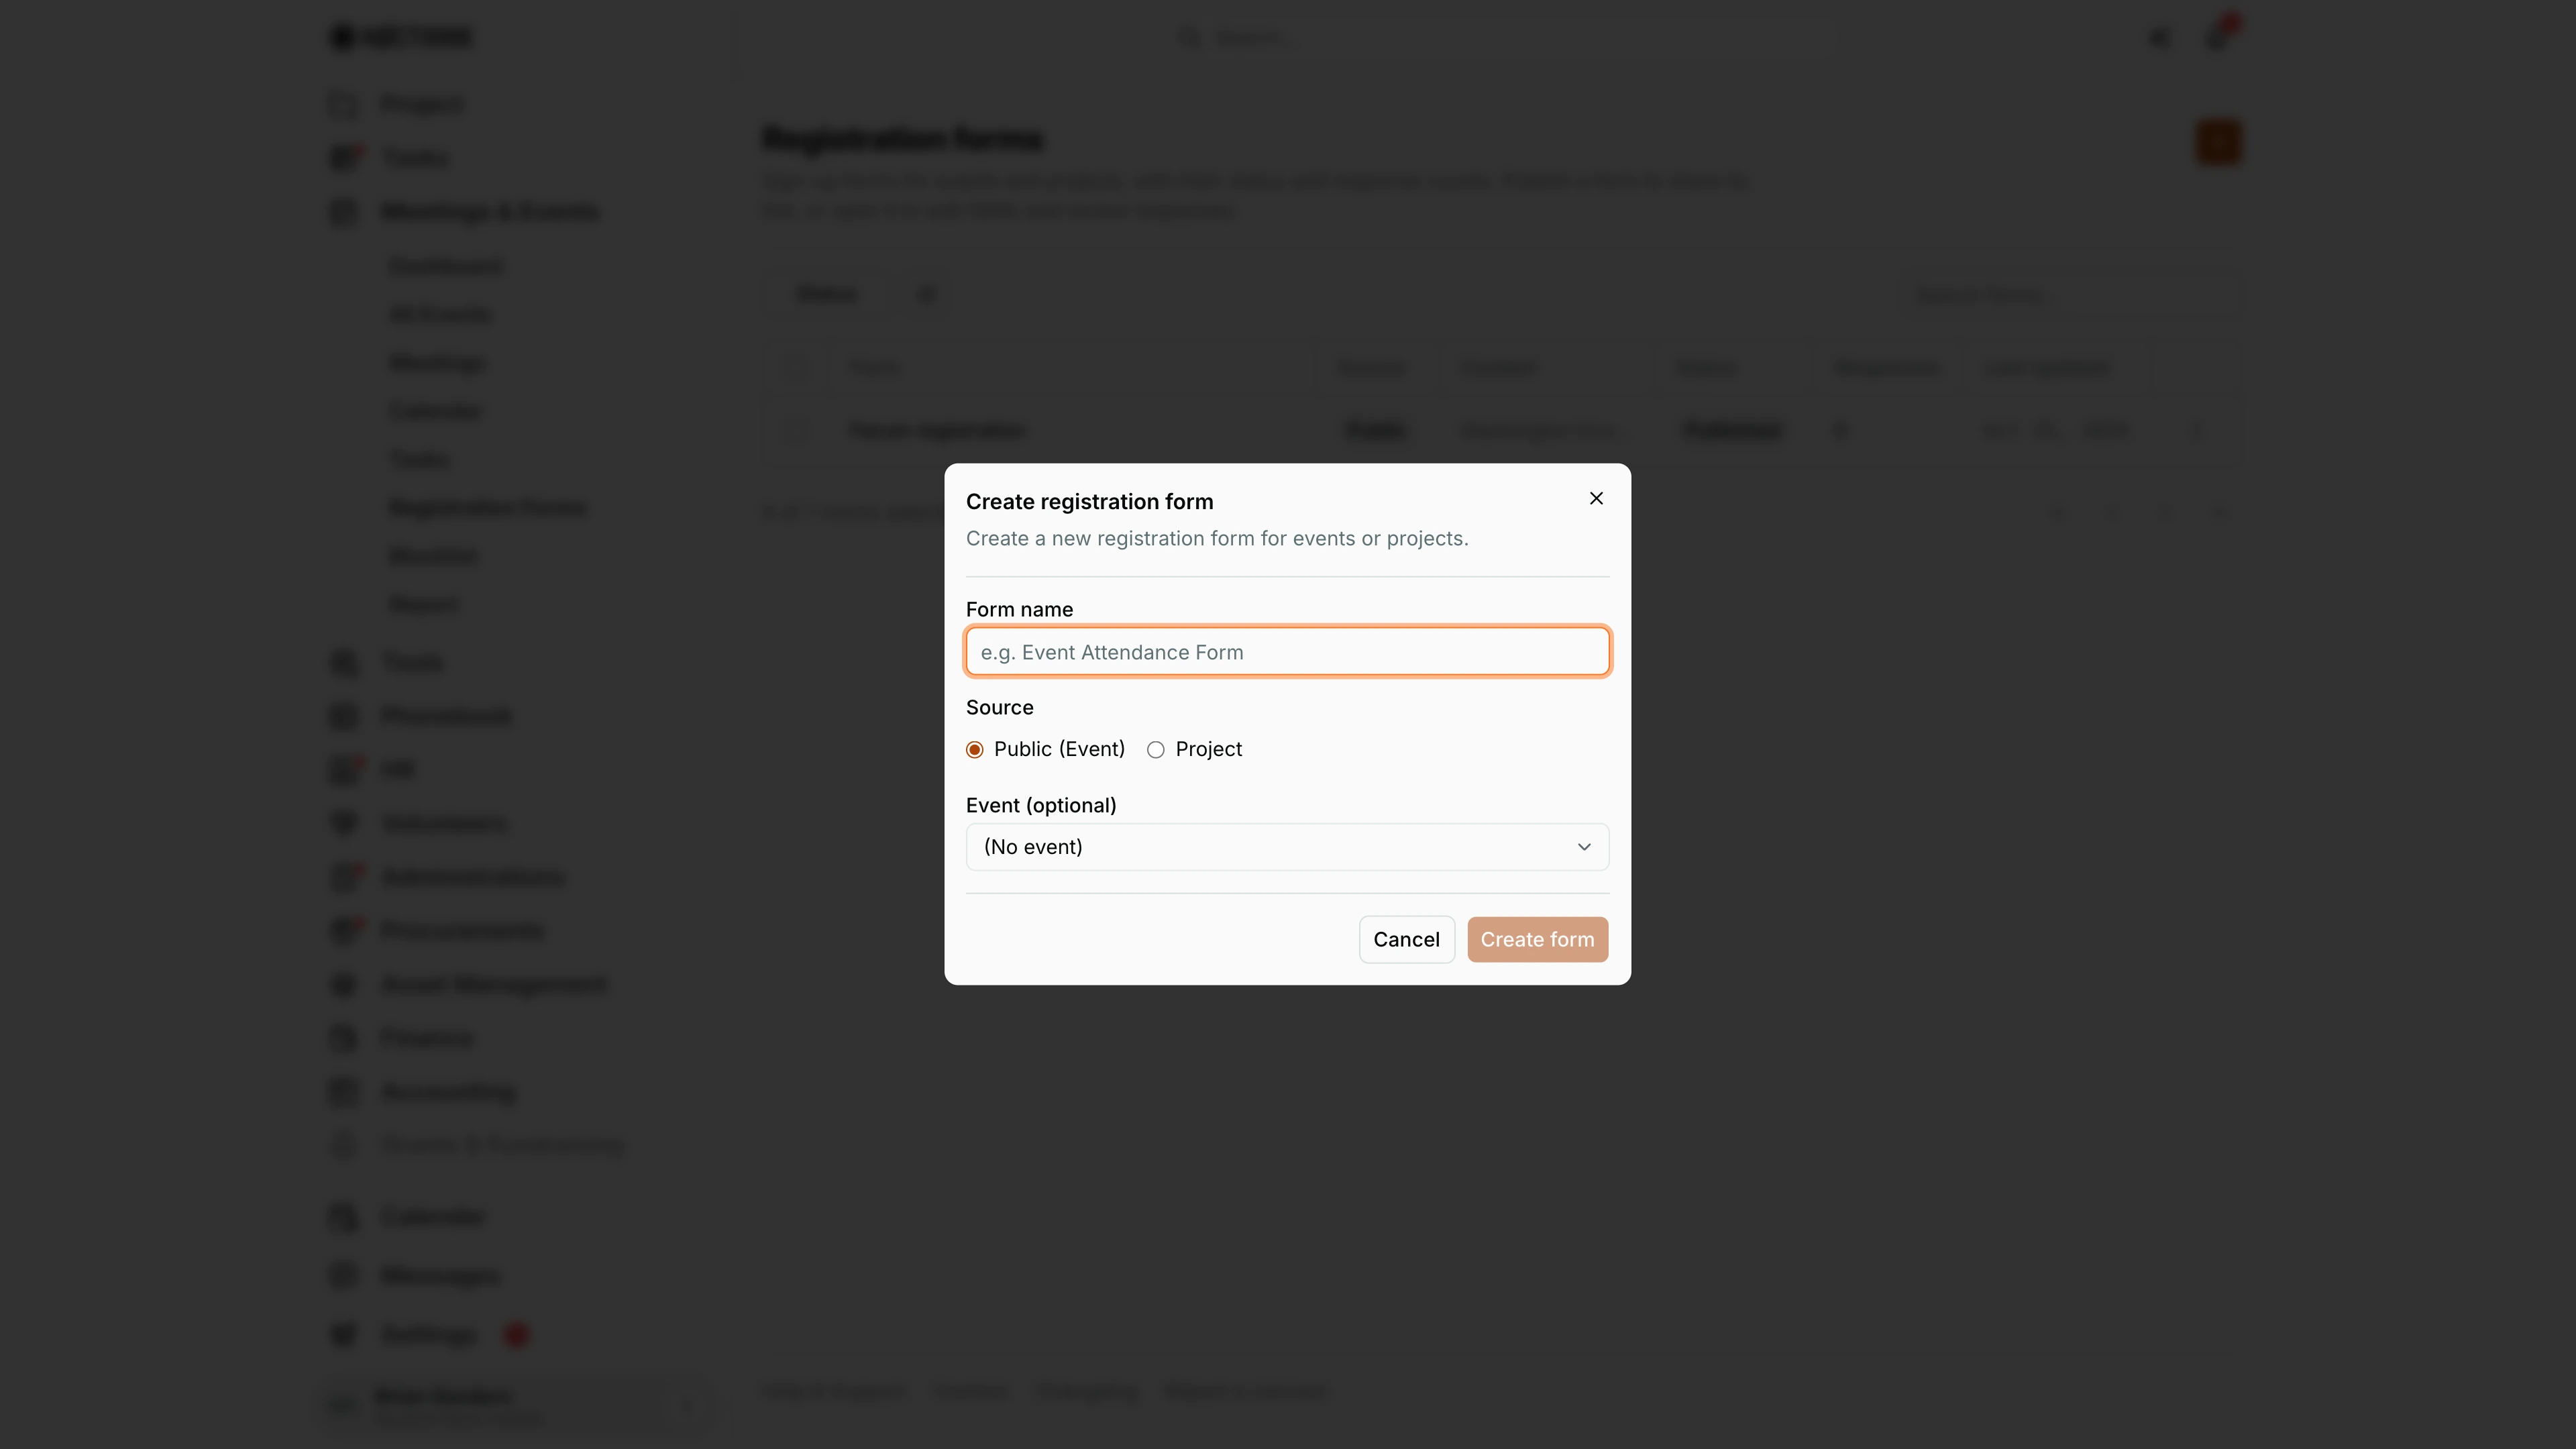
The orange + opens Create registration form: "Create a new registration form for events or projects." I give it a Form name (placeholder "e.g. Event Attendance Form"), choose the Source (Public (Event) or Project) and pick the Event (optional) or project it belongs to. Create form stays disabled until the name is filled in; it saves the form as a draft and opens Form studio straight away.
Registration form detail
Screenshot: Brian Sanders (Deputy Director), Nocthink Demo Institute demo data.
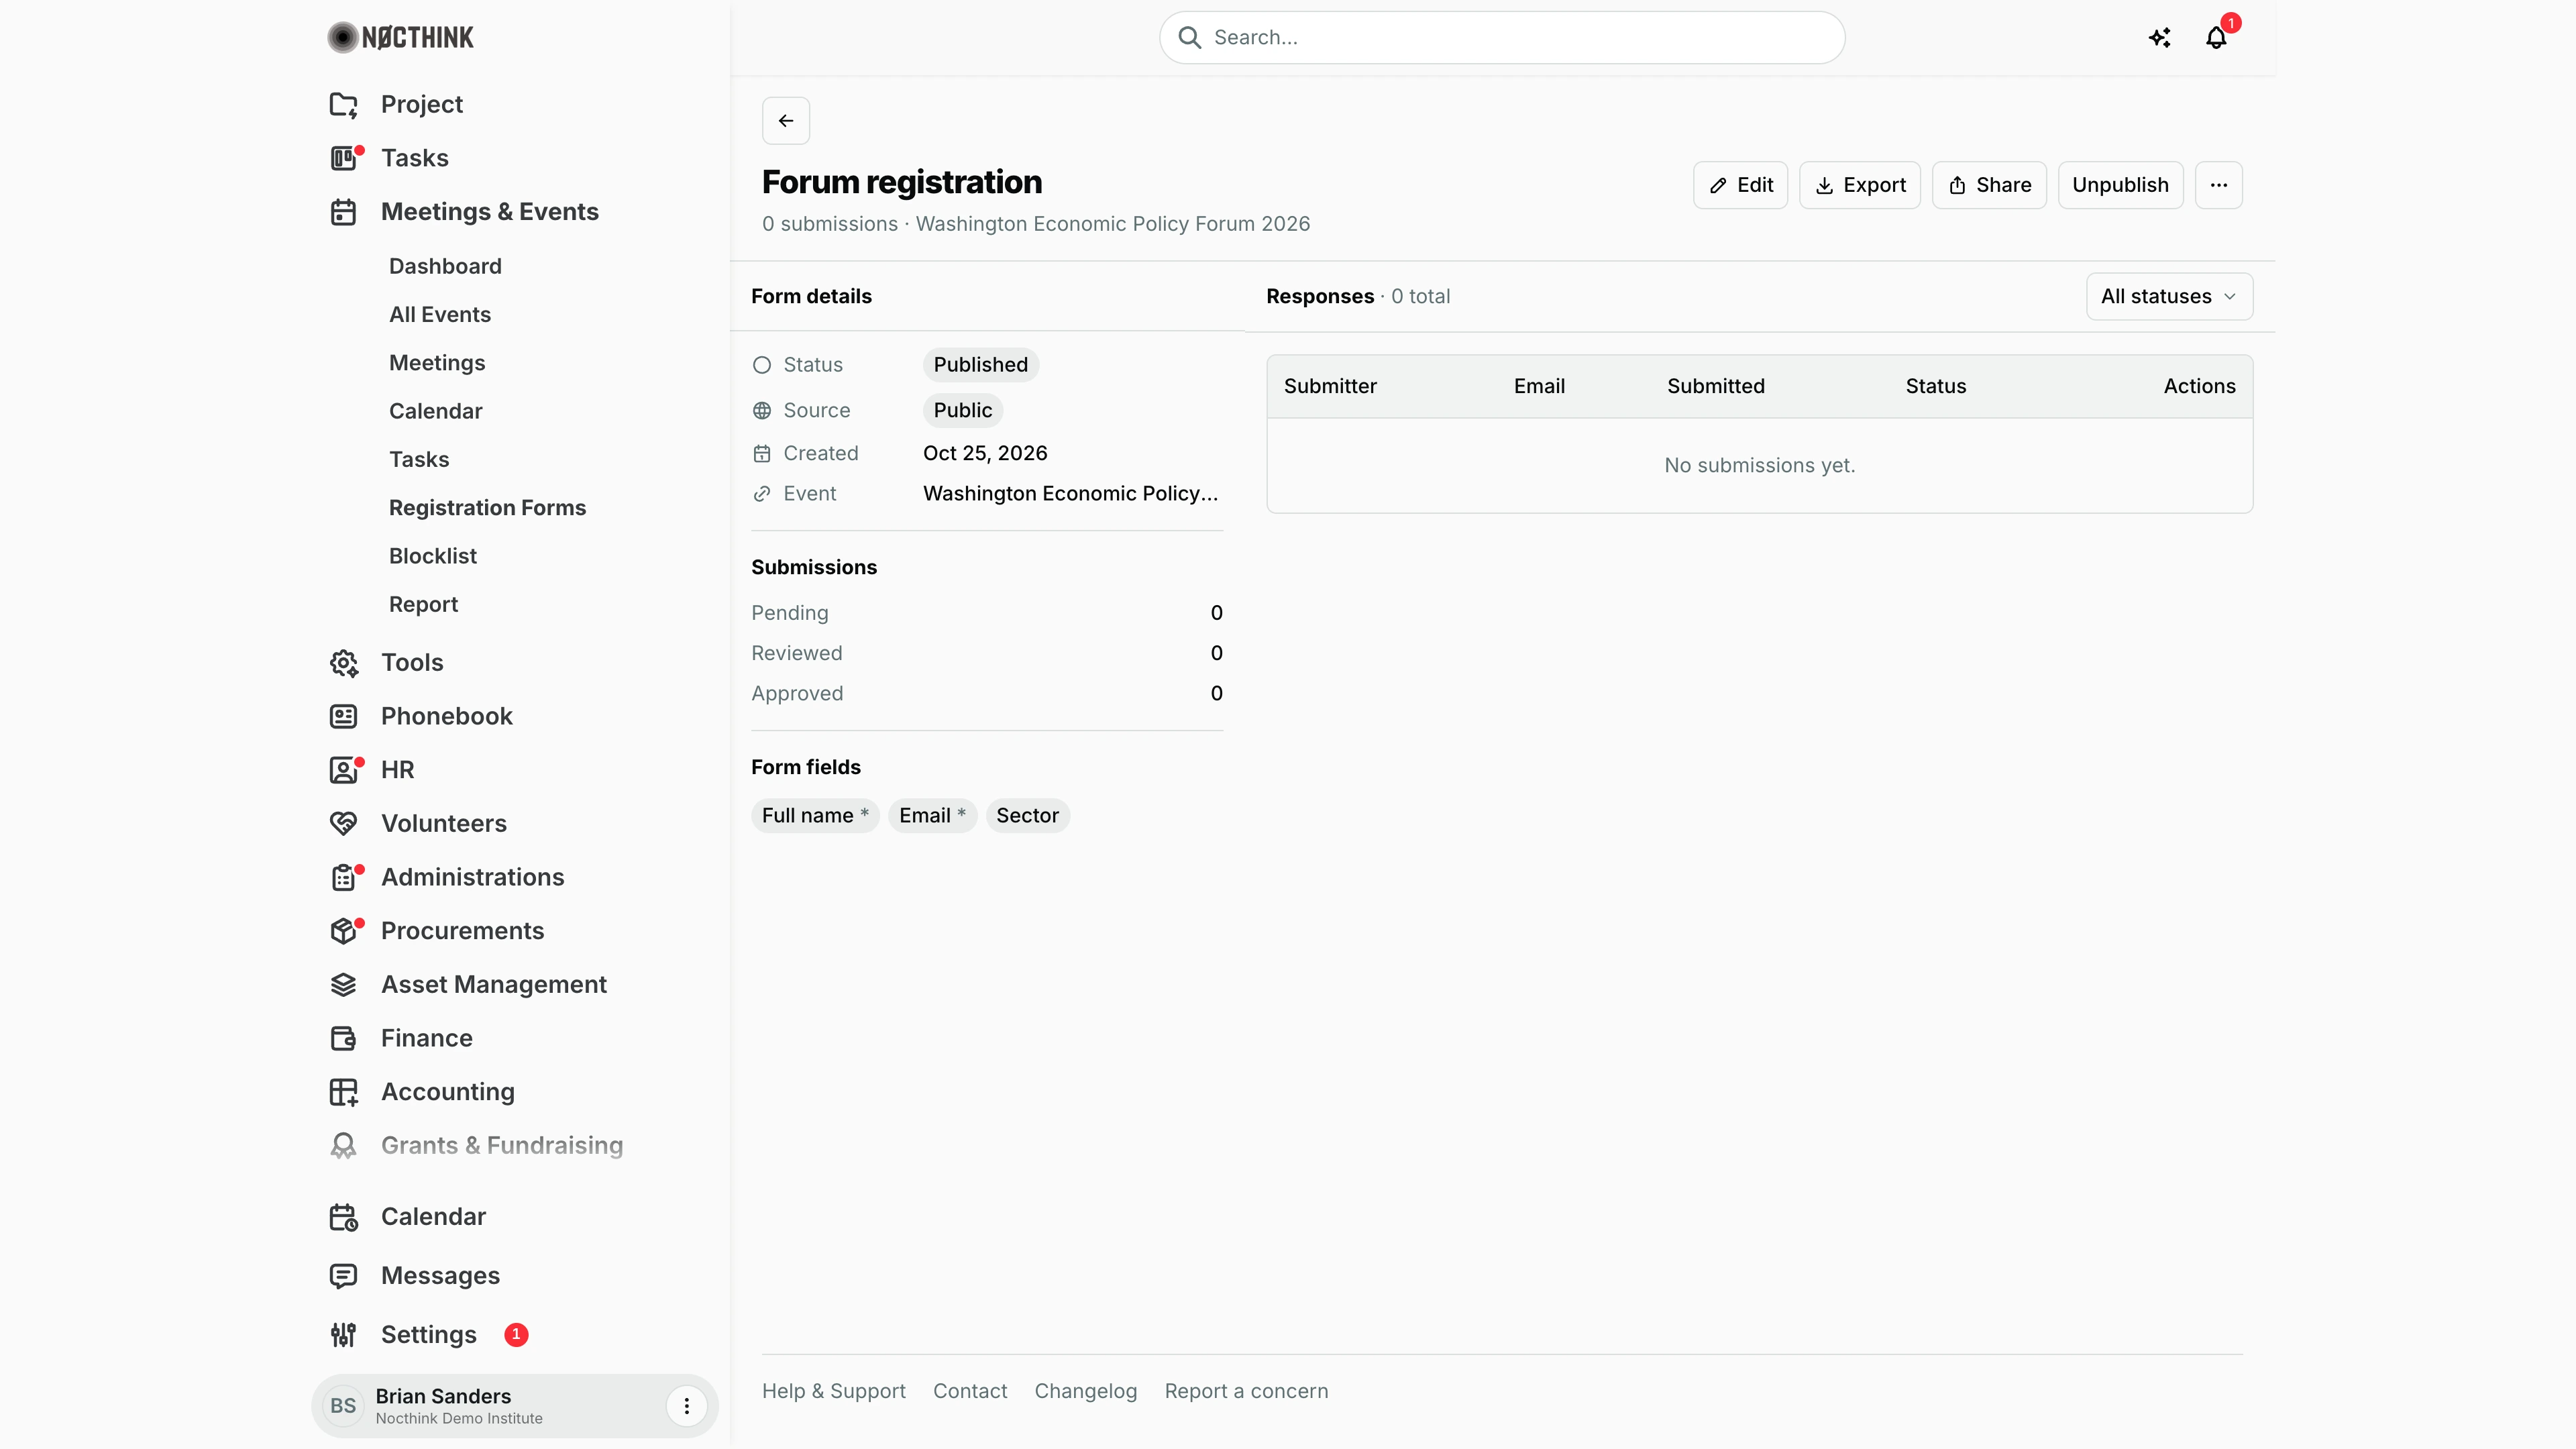
⋮ → View details (or the form name) opens the form's page: the name, "<n> submissions · <event>", and the buttons Edit, Export, Share, Publish or Unpublish, and a ⋯ menu with Close to responses and Delete. The rail shows Form details (Status, Source, Created, the linked Event or Project), Submissions (Pending, Reviewed, Approved counts) and Form fields, with an asterisk on required ones. Responses lists each submission with Submitter, Email, Submitted, Status and Actions, filtered by All statuses. The demo form is published but has no submissions yet.
Form studio
Screenshot: Brian Sanders (Deputy Director), Nocthink Demo Institute demo data.
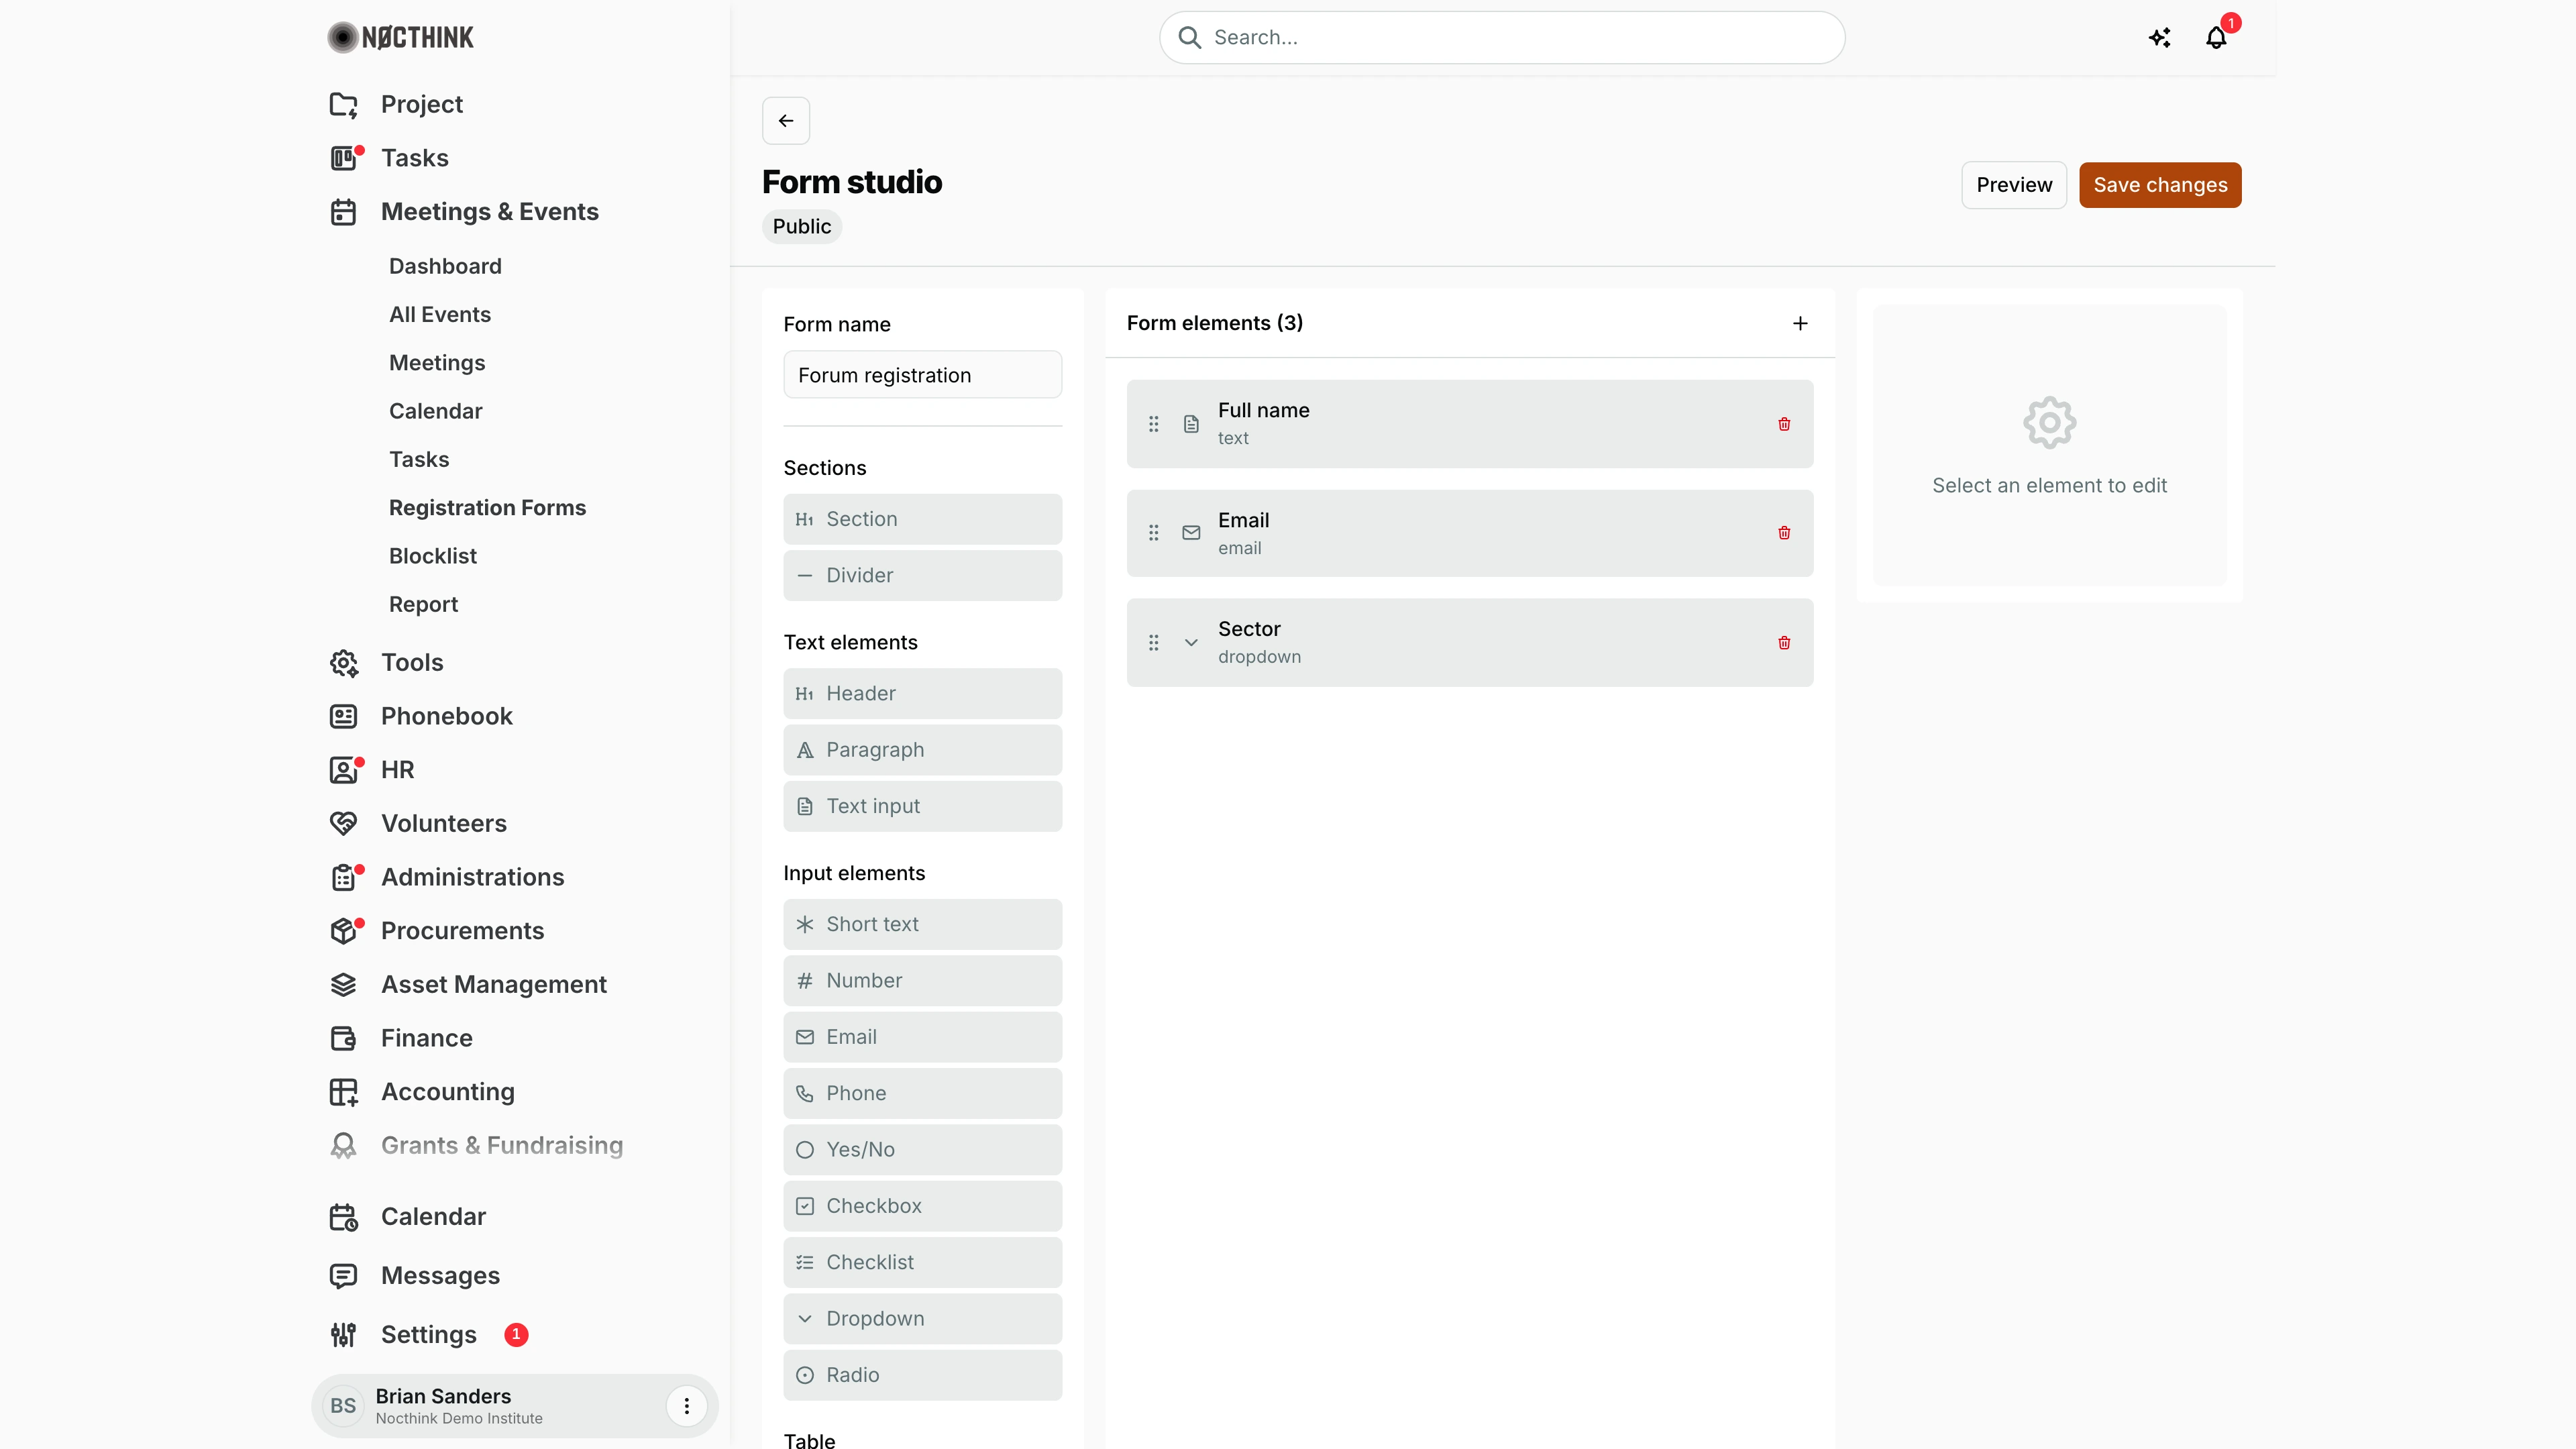
Edit (or ⋮ → Edit form) opens Form studio at /events/registration-form/<id>/edit. On the left are Form name and the palette: Sections (Section, Divider), Text elements (Header, Paragraph, Text input), Input elements (Short text, Number, Email, Phone, Yes/No, Checkbox, Checklist, Dropdown, Radio) and Table. The middle column, Form elements (n), lists the fields in order with their type; drag the handle to reorder, or use the red bin to remove one. Selecting an element opens its properties on the right ("Select an element to edit" until then). Preview opens the public page in a new tab; Save changes writes everything, since nothing autosaves here.
Access & permissions
- The page requires
events.update(lib/domain-routes.ts). In docs/role.md §4.1 that is Owner/Director and Event Officer only; other staff do not see the menu and cannot open the URL. - The public form page needs no login. A draft (unpublished) form is only viewable by members of our organization; submissions are refused unless the form is published.
Caveats
- Submissions from an email on the Blocklist are stored but auto-set to Rejected with the block reason, unless the event's settings turn on blocklist bypass. Matching is by email only, case-insensitive.
- The public form is rate-limited (30 requests per minute per IP) and has a human check, so bulk test submissions from one machine will start failing.
- Delete (list menu or detail … menu) asks "Delete "<name>"? This cannot be undone." — click Export first if I need to keep the responses.
- Editing fields after responses have arrived does not rewrite old answers; removed fields simply disappear from the CSV columns.
- Responses here are form submissions, not event registrations — the event's Registrations tab and the Report figures are counted separately.
Limitations
- Approving a response does not create an event registration or a phonebook contact.
- No Reject button on a response; Rejected only comes from the blocklist.
- No confirmation emails to respondents from this page.
- No form duplication or templates.
Related menus
- All Events — the event the form is attached to; its Registrations tab handles check-in.
- Blocklist — emails whose submissions are auto-rejected.
- Report — registration and attendance figures per event.